
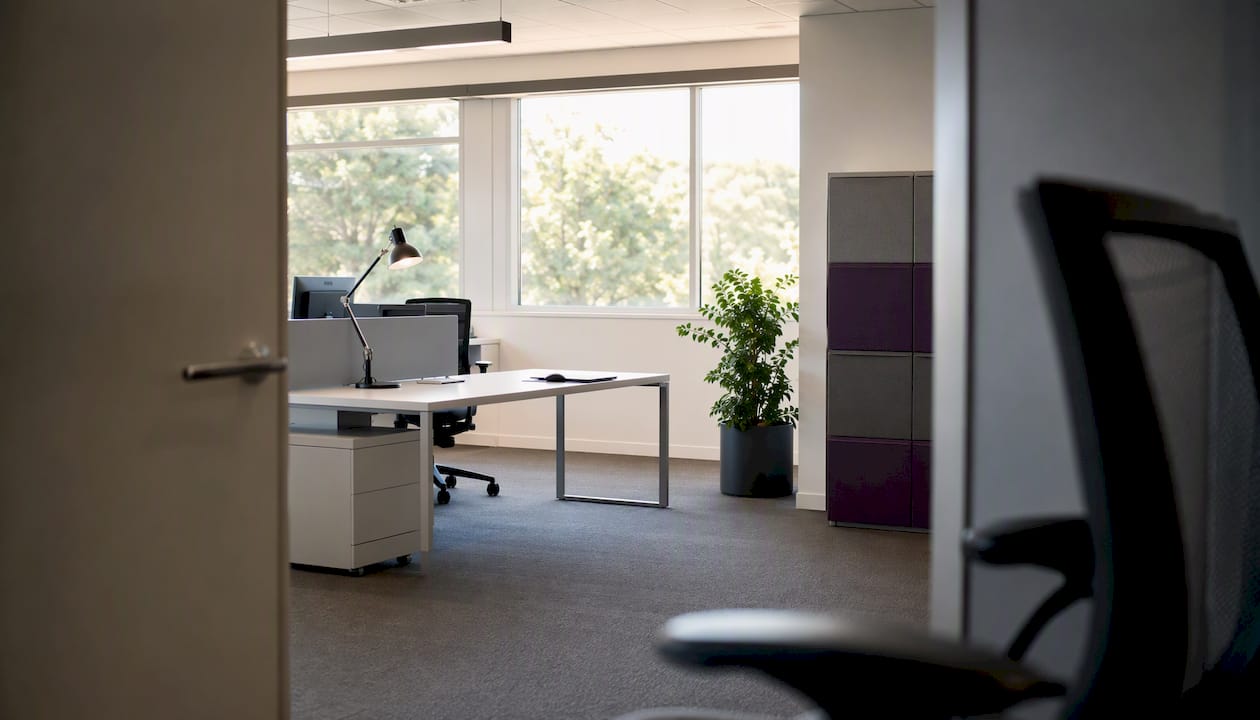
Start by zoning your floor into focus, collaboration, support, and arrival areas, then allocate space by work mode before you order a single desk. This one decision drives every measurement, purchase, and furniture placement that follows. Small-office planning guidance points to a rough baseline of about 100 square feet per person as a starting allocation, not a fixed rule. Treat that number as a sketching tool, then adjust once you know how your teams actually work.
Do these things in the next 48 to 72 hours:
- Measure the full floor plate, including column locations, window lines, door swings, and fixed electrical or plumbing points.
- Count actual headcount against seats needed, factoring in hybrid schedules and visitor traffic.
- Walk the space and flag every piece of equipment that can’t move: server racks, kitchenettes, load-bearing walls.
- Note where natural light falls throughout the day, since that will decide where focus zones go.
- Ask HR for current and projected headcount by department so the layout doesn’t get outgrown in a year.
Before you sketch anything, pull three people into the room: someone from facilities (who knows the building’s limits), someone from IT (who knows where data and power need to land), and someone from HR (who knows hiring plans and accessibility needs). Gather occupancy data, meeting-room demand, and any accessibility requirements up front. Skipping this step is the single most common reason a finished layout gets reworked within six months.
Key Takeaways
The most reliable office furniture layouts start with zoning by work mode, use measurement baselines as flexible guides rather than rules, and get validated through a real pilot before full rollout.
| Point | Details |
|---|---|
| Zone before furnishing | Split the floor into focus, collaboration, support, and arrival zones before selecting any furniture. |
| Use space baselines flexibly | Start from roughly 100 square feet per person, then adjust based on actual work patterns and zone type. |
| Pilot before you commit | Test adjacency and acoustic assumptions with a two-week pilot before ordering furniture at scale. |
| Plan acoustics and power early | Address noise separation and power/data zones in the initial sketch, not as a fix after installation. |
| Bring in specialist support | Niche Projects combines workplace strategy, ergonomic design, and construction management for layout projects that need professional-grade planning. |
Table of Contents
- What Are the Main Types of Office Layout?
- How Do You Plan an Office Furniture Layout Step by Step?
- How Much Space Do You Need Per Person and Desk?
- How Do You Choose Furniture That Fits Your Layout?
- How Do You Manage Noise and Privacy in an Open Office?
- Where Should Storage and Support Zones Go?
- What Do Sample Office Layouts Look Like at Different Sizes?
- What Tools Can You Use to Test a Layout Before Buying Furniture?
- How Does a Professional Fit-Out Process Typically Work?
- What Are the Most Common Office Layout Mistakes?
- How Does Lighting Affect Office Furniture Placement?
- What Health and Safety Rules Apply to Office Furniture Arrangement?
- How Does Layout Affect Employee Well-Being?
- What Actually Separates a Good Layout From a Great One?
- How Can Niche Projects Help You Plan Your Layout?
- Where Can You Find More Layout Planning Resources?
- Frequently Asked Questions
- Sources
What Are the Main Types of Office Layout?
Every office layout is really a variation on seven core patterns, and picking the wrong one for your business is the most expensive mistake you can make before construction even starts.
Open plan removes walls and puts desks in a shared floor, maximizing headcount per square foot and sightlines for supervision. It suits fast-growing teams that value visibility and quick handoffs, but it struggles with noise once you pass roughly 15 people in one zone.
Traditional private offices give each person or small team an enclosed room. This still makes sense for client-facing roles, legal or HR functions handling confidential conversations, or senior leadership who need closed-door calls all day.
Cubicles sit between the two extremes: partial walls give some acoustic and visual separation without the cost of full offices. They work well for transactional roles like data entry or call-center style work where focus matters more than collaboration.
Benching lines up desks in long shared runs with minimal or no dividers. It’s the densest configuration per square foot and fits teams doing project-based collaborative work, like agencies or product squads.
L-shaped layouts suit professionals who need a dedicated desk for deep work plus a separate zone for meeting clients or informal conversations, according to collaborative workspace design research. Think consultants, account managers, or anyone who splits time between solo output and face-to-face meetings.
Hot-desking (also called hoteling) assigns no fixed desk. It’s usually the most space-efficient option for hybrid schedules where attendance varies day to day.
Team clusters group 4 to 6 people into a pod, ideal for teams that need constant, informal communication throughout the day, such as product or design squads.
| Layout type | Best for | Main trade-off |
|---|---|---|
| Open plan | Fast-growing teams, visibility | Noise and distraction at scale |
| Traditional private offices | Confidential work, client-facing roles | Highest cost per person, less collaboration |
| Cubicles | Transactional, focus-heavy roles | Feels dated, limits spontaneous collaboration |
| Benching | Project teams, agencies | Minimal privacy, requires strong acoustic planning |
| L-shaped | Client meetings plus solo work | Uses more floor area per person |
| Hot-desking | Hybrid schedules, variable attendance | Needs booking system and storage lockers |
| Team clusters (4-6) | Squads needing constant contact | Can isolate cluster from wider team |
Most offices end up blending two or three of these rather than committing to one pattern floor-wide. A finance team might sit in cubicles while the product team works benching desks twenty feet away, with a scattering of L-shaped setups for account managers near the reception zone.
How Do You Plan an Office Furniture Layout Step by Step?
A layout that actually works follows a sequence. Skip a step, and you’ll find yourself re-measuring or reordering furniture after installation.
- Define objectives and activity profiles. Write down what each team actually does all day: heads-down work, client calls, whiteboard sessions, phone-heavy sales work. This shapes everything downstream.
- Measure and map the space. Get exact dimensions, column grids, window and door locations, and existing infrastructure points.
- Zone the floor. Assign focus, collaboration, support, and arrival areas based on the activity profiles from step one.
- Build an adjacency matrix. Decide what needs to sit next to what, and what needs distance.
- Select furniture for each zone. Match desk type, seating, and storage to the work happening there.
- Pilot the layout. Test with tape on the floor or a partial rollout before committing to a full furniture order.
- Iterate and document. Adjust based on pilot feedback, then finalize drawings for procurement.
The adjacency matrix deserves special attention because it’s where most layouts go wrong. Quiet zones need distance from social areas; the GCworkplace design guide recommends organizing activity types into quiet, interactive, and support zones with clear separation between them. A café or break area works as a buffer between loud collaboration zones and quiet focus rooms. Printers and shared equipment belong centrally, close enough that no one walks more than 60 to 90 seconds to reach them, but far enough from focus zones that the noise doesn’t carry.
For a small-to-medium office project, expect roughly this timeline:
- Week 1 to 2: Survey the space, interview department heads, gather headcount and activity data.
- Week 3 to 4: Draft a concept layout and adjacency matrix.
- Week 5 to 6: Run a pilot, even a partial one, in the real space.
- Week 7 onward: Iterate based on pilot results, then finalize and roll out.
Pro Tip: Run your pilot for at least two full work weeks, not two days. Track desk utilization, count noise complaints, and monitor how often people book meeting rooms versus using informal collision spaces. A two-day test catches the obvious problems; a two-week test catches the ones that only show up once people settle into a routine.
How Much Space Do You Need Per Person and Desk?
Numbers make layouts defensible, but they only work as starting points, not fixed targets. Successful small-office planners treat per-person square footage as a flexible baseline and prioritize zoning and defined work modes over forcing desks into a rigid grid.
| Measurement | Guideline | Notes |
|---|---|---|
| Space per person | ~100 sq ft (10 m²) | Baseline for small offices, adjust by work mode |
| Main aisle width | 42 to 48 inches | Allows two-way foot traffic |
| Secondary aisle width | 36 inches minimum | Single-direction walkways between desks |
| Clearance behind a desk chair | 36 inches minimum | Room to push back and stand |
| Meeting room clearance | 30 inches around the table | Space to pull out chairs and pass behind seated people |
| Wheelchair turning radius | 60 inches | Required for accessible routes and workstations |
Aisle widths matter more than most managers expect. A 30-inch aisle feels fine when empty but becomes a bottleneck the moment two people pass with coffee cups or a laptop cart. Meeting rooms need clearance not just around the table but along at least one wall, so someone can slip behind seated colleagues without interrupting the meeting.
For accessibility, plan wheelchair clearances and accessible routes from the start rather than retrofitting them. A 60-inch turning radius at key junctions, reach ranges that keep shelving and controls within 15 to 48 inches from the floor, and door widths of at least 32 inches clear opening are the numbers to check against any furniture plan.
Sit-stand desks change your math. A standard sit-stand desk needs the same footprint as a fixed desk but requires extra clearance behind it, since people fully extend their legs and shift position more often. Benching systems tighten per-person space by sharing a single desk run and cable spine, often dropping the effective footprint to 70 to 80 square feet per person. Dense hot-desking schemes can go lower still, since not every seat is occupied simultaneously, but you still need full clearance widths at every occupied position.
How Do You Choose Furniture That Fits Your Layout?
Furniture selection should follow your zoning plan, not precede it. Once you know what each zone does, the furniture list writes itself.
- Task desks for individual focus zones, typically 47 to 60 inches wide for a single occupant.
- Benching systems for collaborative zones, sharing a spine for cable management across four to eight people.
- Sit-stand desks wherever a role involves long stretches at a screen, now considered close to standard rather than a premium add-on.
- Height-adjustable meeting tables in flexible rooms that shift between standing huddles and seated workshops.
- Monitor arms to free up desk surface and let people adjust screen height without stacking books under a laptop.
- Ergonomic task chairs with adjustable lumbar support, seat depth, and armrest height for every desk, not just leadership offices.
- Storage cabinets and lockers sized to headcount, concentrated in support zones rather than scattered at individual desks.
On the ergonomics side, a chair earns its keep when it adjusts in at least five directions: seat height, seat depth, armrest height and width, lumbar support, and recline tension. Desk height for seated work generally lands between 28 and 30 inches; sit-stand desks need to range from about 22 inches (seated) to 48 inches (standing) to suit a range of body sizes. Monitor placement should put the top of the screen at or just below eye level, roughly an arm’s length away, and cable management trays under desks stop cords from tangling around chair casters, a small detail that prevents a surprising number of workplace trip complaints.
Prefer modular and multi-use furniture wherever growth or reorganization is likely. A bench desk system that reconfigures into smaller pods costs more upfront than fixed desking, but it saves a full furniture replacement when headcount shifts. Ergonomic office design done well accounts for this from the first sketch rather than bolting it on after complaints start.
Pro Tip: Plan power and data zones before you finalize furniture placement, not after. Integrated power modules built into benching systems and desk pedestals cost less to install during a fit-out than retrofitting floor boxes once carpet is down.
How Do You Manage Noise and Privacy in an Open Office?
Acoustics have to be part of the layout sketch from day one, not a fix applied after people start complaining. Experts in workplace acoustic design note that getting sound zoning and support-zone placement right early tends to matter more to daily comfort than furniture finishes or color schemes.
Keep loud collaboration areas physically separated from quiet focus zones, using buffers rather than putting them wall-to-wall. A café, kitchen, or circulation corridor between a busy team cluster and a quiet zone absorbs sound spill better than a single partition wall. This kind of acoustic zoning should be part of the initial layout sketch, according to research on quiet study and focus environments, rather than something addressed after the furniture is already in place.
For materials, acoustic panels on walls and ceilings cut reverberation in open zones. Soft seating in informal collaboration areas absorbs sound that hard surfaces would otherwise bounce around the floor. Glass partitions around focus rooms need proper seals, since a gap under a glass door defeats the purpose entirely. Solid-core doors, not hollow ones, on any enclosed focus room or phone booth make a measurable difference in how much conversation leaks through.
The effect of quiet zones on daily focus and stress levels is well documented, and it’s one of the cheapest problems to solve at the design stage compared to after move-in.
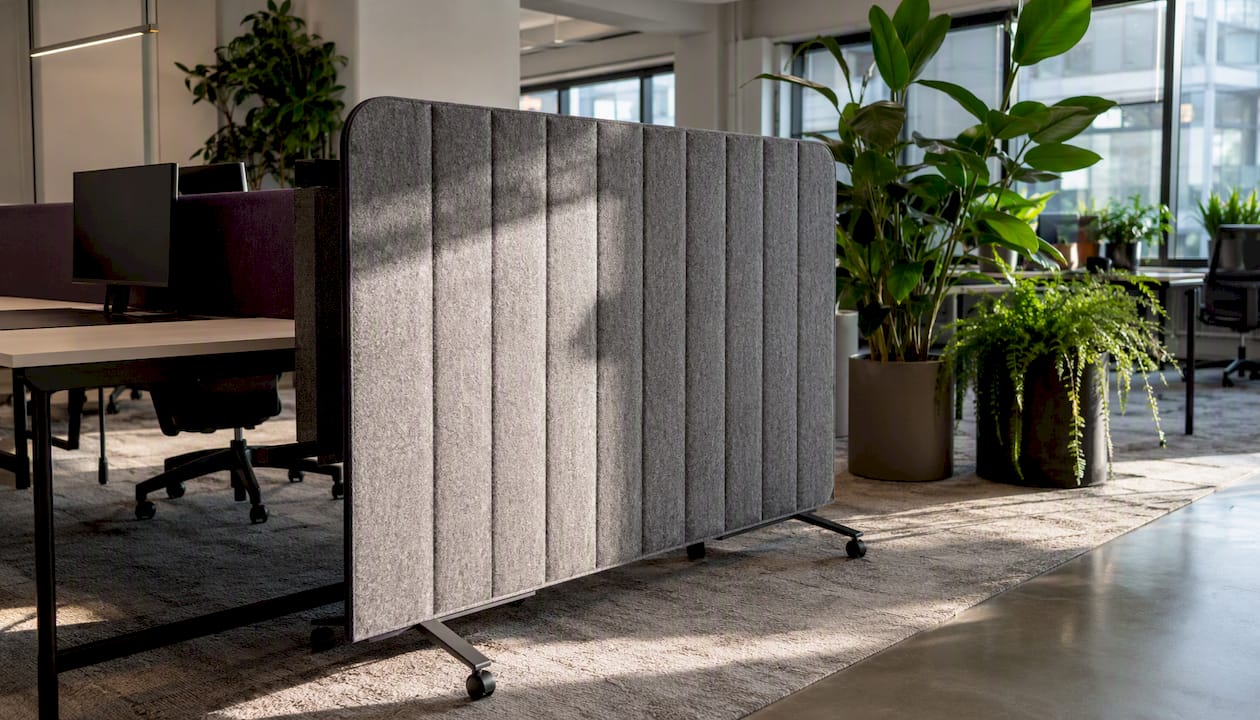
Pro Tip: During a pilot, test acoustic fixes that don’t require construction: felt partition screens on wheels, a few strategically placed plants, and rugs under high-traffic desk clusters. If noise complaints drop meaningfully during the pilot, you’ve found your permanent fix without touching a wall.
Where Should Storage and Support Zones Go?
Support zones handle the unglamorous parts of office life, printers, supplies, filing, and if you get their placement wrong, clutter creeps onto every desk in the building.
- Centralize shared equipment like printers, scanners, and supply cabinets in one or two locations rather than scattering small printer stations throughout the floor.
- Use vertical storage wherever possible; a wall of shelving or lockers holds far more per square foot than under-desk drawers.
- Locate support zones to minimize walking distance for the teams that use them most, while keeping enough distance from focus zones to avoid printer noise bleeding into quiet work.
- Size support zones relative to headcount and function: a 20-person office needs meaningfully less printer and filing capacity than a 100-person floor, but proportionally more per-person storage if the work involves physical documents.
Centralized “back of house” storage reduces desk clutter far more effectively than trying to squeeze filing cabinets next to every workstation, a point confirmed by research on small office organization. It also reads as more professional to visitors and clients walking through the space.
Hot-desking setups need their own storage logic. Since no one owns a fixed desk, personal storage moves to lockers near the entry or in a dedicated bank along one wall. A locker roughly 12 by 15 inches per person, assigned or on a daily-use basis, covers a laptop bag, a change of shoes, and a few personal items without forcing people to carry everything from home each day. Making the most of your office space often comes down to getting this single detail right before anything else.
What Do Sample Office Layouts Look Like at Different Sizes?
Concrete examples save more planning time than any amount of general advice, so here’s how the zoning principle plays out at three common office sizes.
Small office (about 1,000 square feet). A practical split here runs focus space at 45 to 55%, collaboration at 15 to 20%, support at 15 to 20%, and arrival space at 10 to 15%, according to a 1,000 square foot office playbook. At this size, every square foot counts, so modular furniture that can reconfigure as headcount grows matters more than in a larger footprint. The most common mistake is building a formal meeting room that eats a quarter of the floor while leaving no informal spot for two people to talk through a problem.
Medium office (3,000 to 5,000 square feet). This size supports a genuine mix of zones, benching runs for project teams, a handful of enclosed focus rooms, a couple of medium collaboration rooms, and a clear support zone near the center. The mistake to avoid is running one long, uninterrupted benching layout with no acoustic breaks. Break it into sections of 6 to 8 desks separated by storage units or planters so sound doesn’t travel the full length of the floor.
Open-plan with team clusters (5,000+ square feet). At this scale, repeat 4 to 6 person pods across the floor, rather than defaulting to rows of identical desks. This layout works only if you protect sightlines and daylight access for interior pods, since the desks furthest from windows are the ones that feel forgotten first. Office layouts and which suits your business walks through how to match cluster size to team function rather than just filling the floor plate evenly.
Across all three sizes, keep sightlines open and scale furniture to the room. A guide on arranging small office space makes the case for prioritizing lighting, acoustics, and ergonomics ahead of decorative upgrades, and that priority order holds regardless of square footage.
What Tools Can You Use to Test a Layout Before Buying Furniture?
You don’t need architecture software to test a layout idea, but at some point a proper tool saves you from an expensive furniture-ordering mistake.
RoomSketcher follows a straightforward three-step workflow: draw the floor plan, furnish it from a large furniture library, then preview the result in 3D, according to RoomSketcher’s own description of its office design tool. It’s a strong fit for managers who want to visualize a concept quickly without learning CAD software.
SmartDraw works more like a diagramming tool than a 3D visualizer, useful for producing clean, to-scale floor plans and adjacency diagrams that you can hand to a contractor or share in a planning meeting. It suits managers who want a fast, precise 2D plan rather than a photorealistic render.
Low-tech methods still have their place, especially early in the process:
- Scaled paper cutouts of furniture, moved around a printed floor plan, cost nothing and let a whole team weigh in during a 30-minute session.
- Tape marked directly on the floor at real desk dimensions lets people walk the actual space before a single piece of furniture arrives.
- A simple occupancy survey, tracking who sits where and how often desks go unused, tells you more about real space needs than any software model.
| Method | Best for | Limitation |
|---|---|---|
| RoomSketcher | Visualizing concepts in 3D | Less precise for construction drawings |
| SmartDraw | Producing scaled 2D plans for contractors | No 3D visualization |
| Paper cutouts | Quick team brainstorming sessions | Not precise, hard to share remotely |
| Tape-on-floor pilot | Testing real dimensions before ordering | Only tests footprint, not acoustics or lighting |
| Occupancy survey | Confirming actual usage patterns | Takes weeks to gather reliable data |
Move from DIY tools to hiring a professional workplace designer once you’re planning for more than roughly 30 people, dealing with structural constraints like columns or fixed mechanical points, or juggling multiple stakeholder groups with conflicting space demands. At that point, the coordination cost of getting it wrong outweighs whatever you’d save doing it in-house.
How Does a Professional Fit-Out Process Typically Work?
A typical office fit-out moves through a predictable sequence, and knowing the stages helps you brief a designer or contractor without surprises partway through.
- Brief: Define objectives, headcount, work modes, and budget constraints.
- Design: Develop the zoning concept, adjacency matrix, and furniture specification.
- Approvals: Sign off on drawings, finishes, and budget before procurement begins.
- Procurement: Order furniture, fixtures, and any custom joinery with realistic lead times.
- Installation: Coordinate trades, deliveries, and furniture assembly on site.
- Punchlist: Walk the finished space and flag any defects or adjustments before handover.
- Handover: Final documentation, warranty information, and move-in support.
Niche Projects works this process by combining workplace strategy, design, and construction management under one roof rather than handing a design off to a separate contractor. That reduces the risk of a beautiful floor plan that turns out to be unbuildable on the actual site, since the same team that designs the zoning also manages the trades that build it.
A layout that looks right on paper only earns its keep once real teams are sitting in it, running real meetings, and moving through it without bumping into a printer queue at 9 AM.
If you’re weighing whether to brief a designer or handle the layout internally, a short conversation about your floor plate, headcount, and growth plans usually clarifies the answer faster than another round of internal debate.
What Are the Most Common Office Layout Mistakes?
Most layout failures trace back to one of a handful of repeatable mistakes, and every one of them is avoidable if you catch it during planning instead of after move-in.
- Treating per-person square footage as a fixed target rather than a flexible baseline. Fix: build the zoning plan first, then check the per-person number as a sanity check, not the other way around.
- Ignoring acoustics until after installation. Fix: budget for acoustic treatment in the initial furniture and fit-out plan, not as a change order later.
- Under-sizing support zones relative to actual headcount and document volume. Fix: survey current printer and filing usage before finalizing storage square footage.
- Overloading power circuits and data ports by underestimating how many devices each desk will actually host. Fix: plan for at least two power outlets and one data port per desk, more in tech-heavy teams.
- Locking into inflexible furniture that can’t be reconfigured as headcount or work patterns change. Fix: prioritize modular benching and desks over fixed built-in furniture wherever budget allows.
Watch for these warning signs once the layout is live: persistent utilization mismatches (some zones packed, others empty most weeks), recurring noise complaints from the same area, or repeated meeting-room booking conflicts. Any one of these, sustained for more than a few weeks, means it’s time to pause and re-evaluate rather than assume people will adjust.
How Does Lighting Affect Office Furniture Placement?
Lighting decides where your best desks go before anyone touches a tape measure. Natural light along window walls should generally go to shared collaboration zones and desks used for extended focus work, since daylight exposure has a well-documented effect on alertness and mood throughout the day. Placing a private office or storage wall along the window line, a mistake seen constantly in older fit-outs, wastes the best light in the building on the people who benefit least from it.
Artificial lighting needs to match the zone it serves. Focus areas benefit from even, glare-free task lighting positioned to avoid screen reflections, typically achieved with indirect or diffused fixtures rather than direct overhead down-lights. Collaboration zones can handle brighter, more energetic lighting since people aren’t staring at a screen for hours at a stretch. Support zones and circulation paths need enough light for safety and wayfinding but don’t require the same quality of light as a workstation.
Desks positioned perpendicular to windows, rather than facing directly into or away from them, generally cut glare complaints more than any lighting fixture change can. That’s a furniture placement decision, not a lighting one, and it costs nothing to get right during the initial layout sketch.
What Health and Safety Rules Apply to Office Furniture Arrangement?
Furniture arrangement carries real safety obligations, not just comfort considerations. Clear egress paths to fire exits must stay unobstructed at all times, which means furniture layouts need enough margin that a desk expansion or a temporary storage cart never encroaches on an exit route.
Aisle widths matter for safety as much as comfort. The clearance guidelines covered earlier, roughly 42 to 48 inches for main aisles and 36 inches minimum for secondary walkways, aren’t arbitrary comfort numbers; they reflect the space people need to evacuate quickly and for wheelchair users to navigate without obstruction. Accessible routes need to run continuously from every workstation to an accessible exit, not just from the main entrance.
Cable management is a safety issue as much as an aesthetic one. Loose cords across walkways are a leading cause of workplace trip incidents, and any furniture plan should route power and data through desk-integrated channels or floor boxes rather than trailing cables across open floor.
Ergonomic arrangement also falls under general workplace health obligations in most jurisdictions. Monitor height, chair adjustability, and desk height all factor into reducing repetitive strain injury risk over time, which is part of why ergonomic furniture selection belongs in the layout plan from the start rather than as an afterthought once complaints start arriving. This article offers general planning guidance rather than a compliance audit; confirm current workplace health and safety obligations for your specific building and jurisdiction with a qualified professional before finalizing a layout.
How Does Layout Affect Employee Well-Being?
Well-being factors into layout decisions in ways that go beyond ergonomics and acoustics, and biophilic design is one of the clearest examples. Positioning plants, natural materials, and views of greenery near workstations has a measurable association with lower reported stress and higher satisfaction, which is why many modern layouts dedicate space to living walls or planted dividers rather than treating greenery as decoration alone.

Break areas deserve real square footage, not a leftover corner near the kitchen. A break space that’s genuinely separate from work zones, with comfortable seating and enough acoustic separation that people can have a private conversation, gives employees an actual mental reset rather than a five-minute pause at their own desk. Office design and mental health outcomes are closely tied to whether people have somewhere to step away that doesn’t feel like an extension of the workstation they just left.
Neurodiversity considerations belong in this conversation too. Some employees need low-stimulation zones with reduced light and sound; others work better with more activity and visual variety nearby. A layout with genuine zone diversity, some quiet, some social, some in between, serves a wider range of working styles than a single uniform floor plan ever will.
What Actually Separates a Good Layout From a Great One?
Every layout guide tells you to measure the space and count desks. What most guides skip is that the layouts holding up years later are the ones built around how people actually behave, not how the org chart says they should behave.
I’ve watched plenty of well-intentioned floor plans get quietly abandoned within a year because the zoning matched a headcount spreadsheet instead of real work patterns. The product squad given a formal boardroom when what they needed was three whiteboard walls and beanbags nobody had to book in advance.
The lesson that keeps repeating across projects is simple: start with work patterns and zoning, not aesthetics. A beautifully finished office with the wrong adjacency matrix will frustrate people daily in ways no amount of nice furniture fixes. Get the zoning right first. Everything else, the desk brand, the chair fabric, the artwork, is genuinely secondary, and treating it otherwise is the most expensive planning mistake a manager can make.
How Can Niche Projects Help You Plan Your Layout?
If you’ve read this far, you already know the hard part isn’t picking furniture, it’s getting the zoning, measurements, and adjacency right before you spend a dollar on desks. That’s exactly the gap Niche Projects closes: instead of guessing at square footage or hiring a furniture vendor who only sells you desks, you get a team that combines workplace strategy, space planning, ergonomic design, and construction management under one contract.
The process mirrors what’s outlined throughout this guide: a collaborative brief to understand your actual work patterns, a pilot or mockup phase to test zoning assumptions before committing, and a documented layout your team can act on with confidence. Niche Projects handles the ergonomic office design work and the construction management together, so the plan that gets approved is the one that actually gets built, without the usual handoff gaps between designer and contractor.
If you’re at the stage where you need more than a template, request a free office space plan and get a scoped starting point for your specific floor, headcount, and budget.
Where Can You Find More Layout Planning Resources?
- How to Create an Efficient Small Office Floor Plan covers per-person space baselines and zoning fundamentals for small offices.
- Office Design Software from RoomSketcher offers a 3D drawing tool for testing furniture layouts before purchase.
- GCworkplace Design Guide provides detailed zoning terminology and accessibility standards referenced throughout this guide.
- Collaborative Learning Space Design Guidelines breaks down layout configurations for different collaboration needs.
- Startup Office Design: 1,000 Sq Ft Playbook includes a downloadable zone-split template for small-office planning.
- How to Design Collaboration Spaces That Teams Actually Use explains huddle rooms, tactical rooms, and pilot-testing methods for collaboration zones.
Frequently Asked Questions
What is the ideal square footage per person in an office layout?
Roughly 100 square feet per person works as a starting baseline for small offices, but treat it as flexible rather than fixed. Adjust up for zones needing meeting space and down for dense benching or hot-desking areas.
Should I zone my office before or after choosing furniture?
Zone first. Define your focus, collaboration, support, and arrival areas based on actual work patterns, then select furniture that fits each zone’s function.
How wide should office aisles be?
Main aisles need 42 to 48 inches for two-way traffic, while secondary walkways between desks can work with a 36-inch minimum. Wider clearance is required near accessible routes and fire exits.
Is open-plan or hot-desking better for a hybrid office?
Hot-desking is usually the more space-efficient choice for hybrid schedules where daily attendance varies, since it doesn’t tie unused desks to specific employees on their remote days.
When should I hire a professional office designer instead of planning it myself?
Consider bringing in a professional once you’re planning for more than about 30 people, facing structural constraints like columns or fixed utilities, or coordinating several departments with conflicting space needs.
Sources
- How to Create an Efficient Small Office Floor Plan
- Collaborative-learning-space-design-guidelines.pdf
- GCworkplace design guide (EN)
- Startup Office Design on a Shoestring: 1,000 Sq Ft Playbook